GET INVOICE FIRST
GET INVOICE FIRST
The first part of this process happens before you enter into Class Wallet. You need to obtain an invoice from the vendor for the service or product you are wanting to purchase. This part varies by vendor. Contact them if you are not certain. Some you checkout on their website and select to pay with EFA funding and then they email an invoice to upload. Some you fill the cart and screenshot it and email it to them for a proper invoice. For services you simply ask for the service invoice to upload. Once you have obtained your invoice you are ready to follow the steps below.
Print Page only works from a PC not a phone
How to use direct pay on your cell phone. Step by Step.

1. When you go to class wallet on your phone the first thing you see is the login page. Here put in your information, prove you are not a robot, probably prove it a second time…

2. Next it will throw up a notice you can click I UNDERSTAND and keep going.


3. Now scroll down the page to where you see Direct Pay - Pay for services and click where it says PAY there on the button.
4. Another reminder pops up. Click the I understand button and keep going.

5. Now it wants to know who you want to pay. Type in the vendors name and once you see your vendor come up click the vendor.
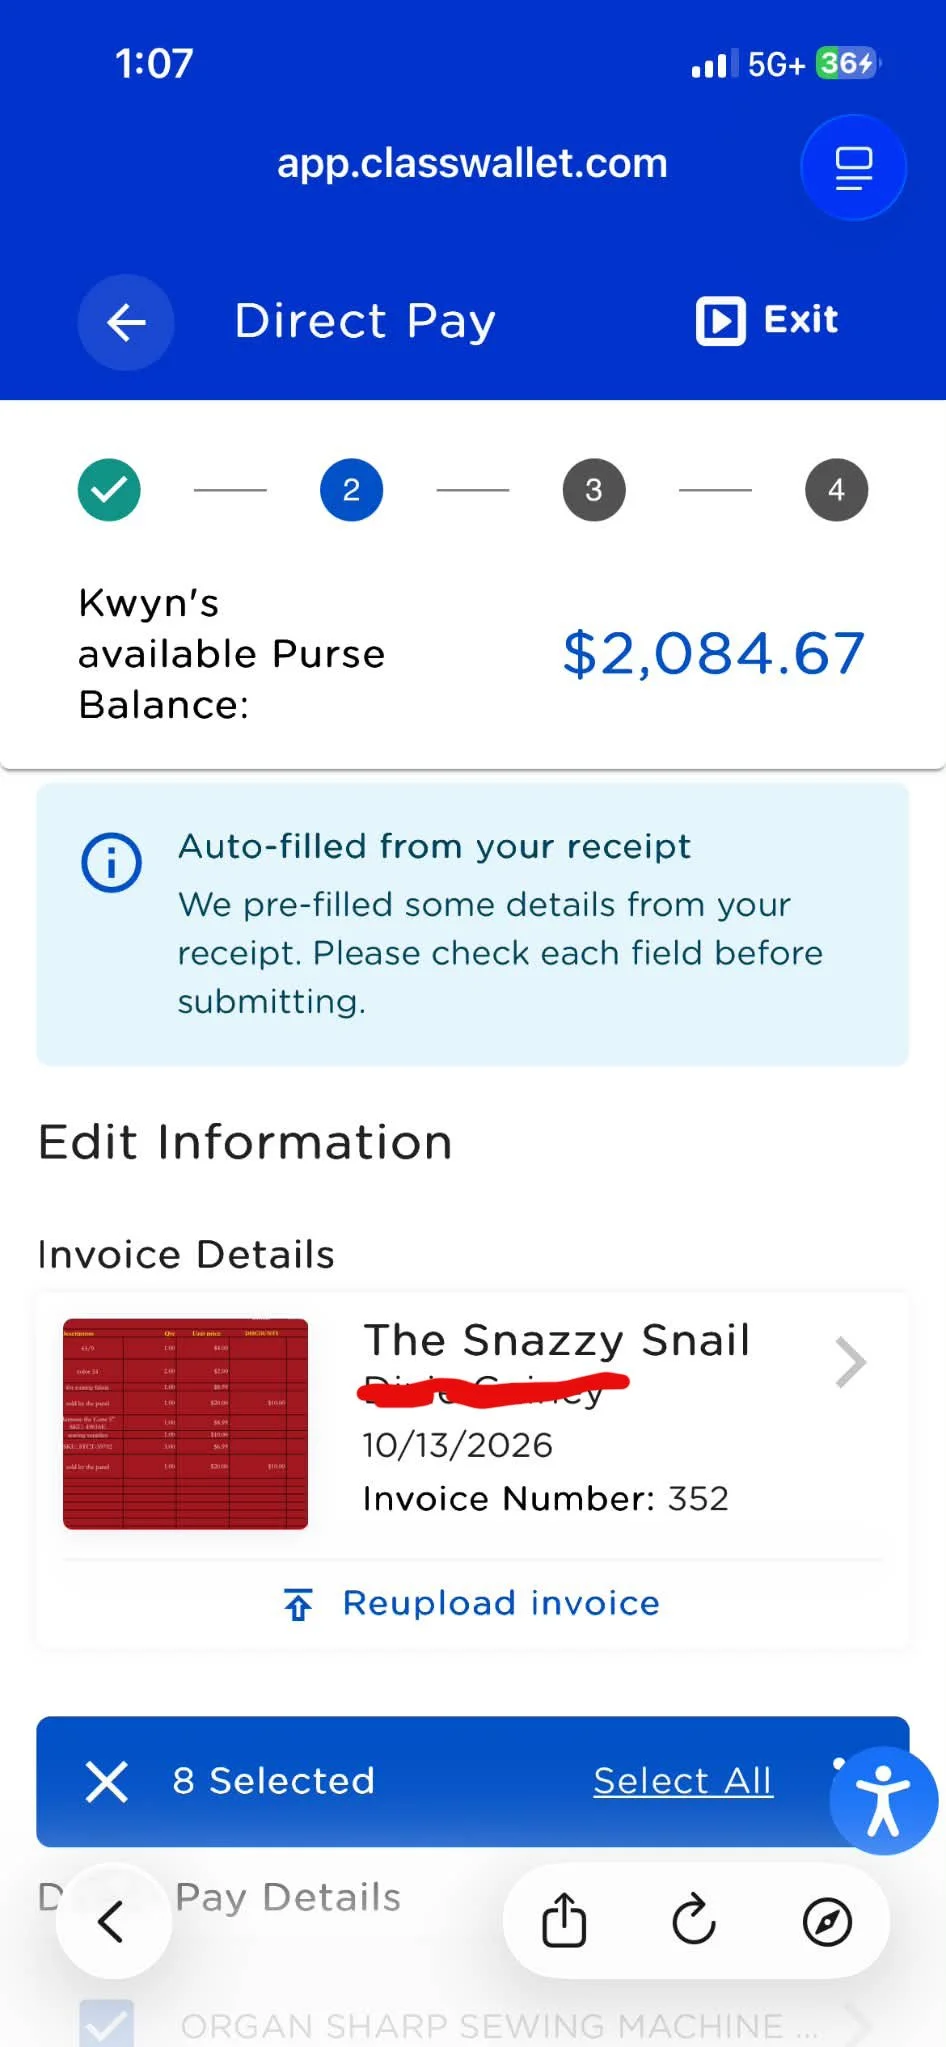
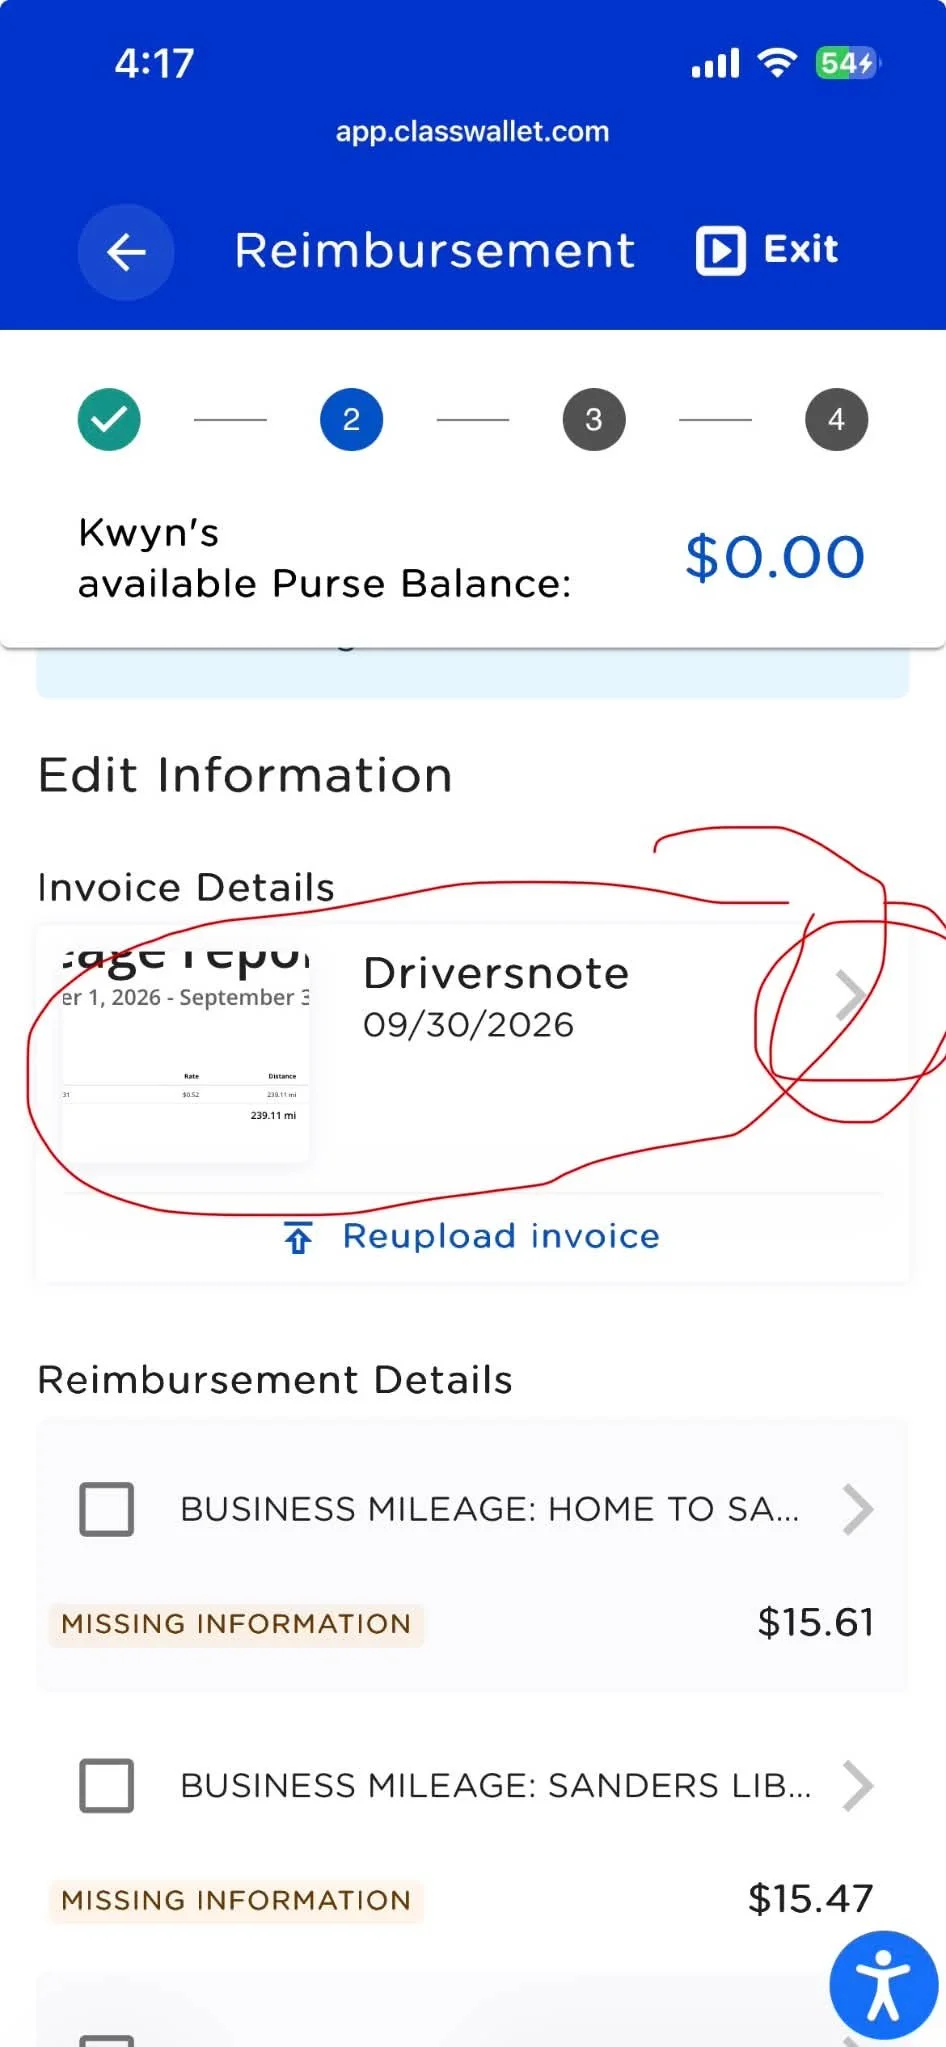
6. upload the invoice and have it scan it.
7.Next to where it lists the vendor name click that arrow there.
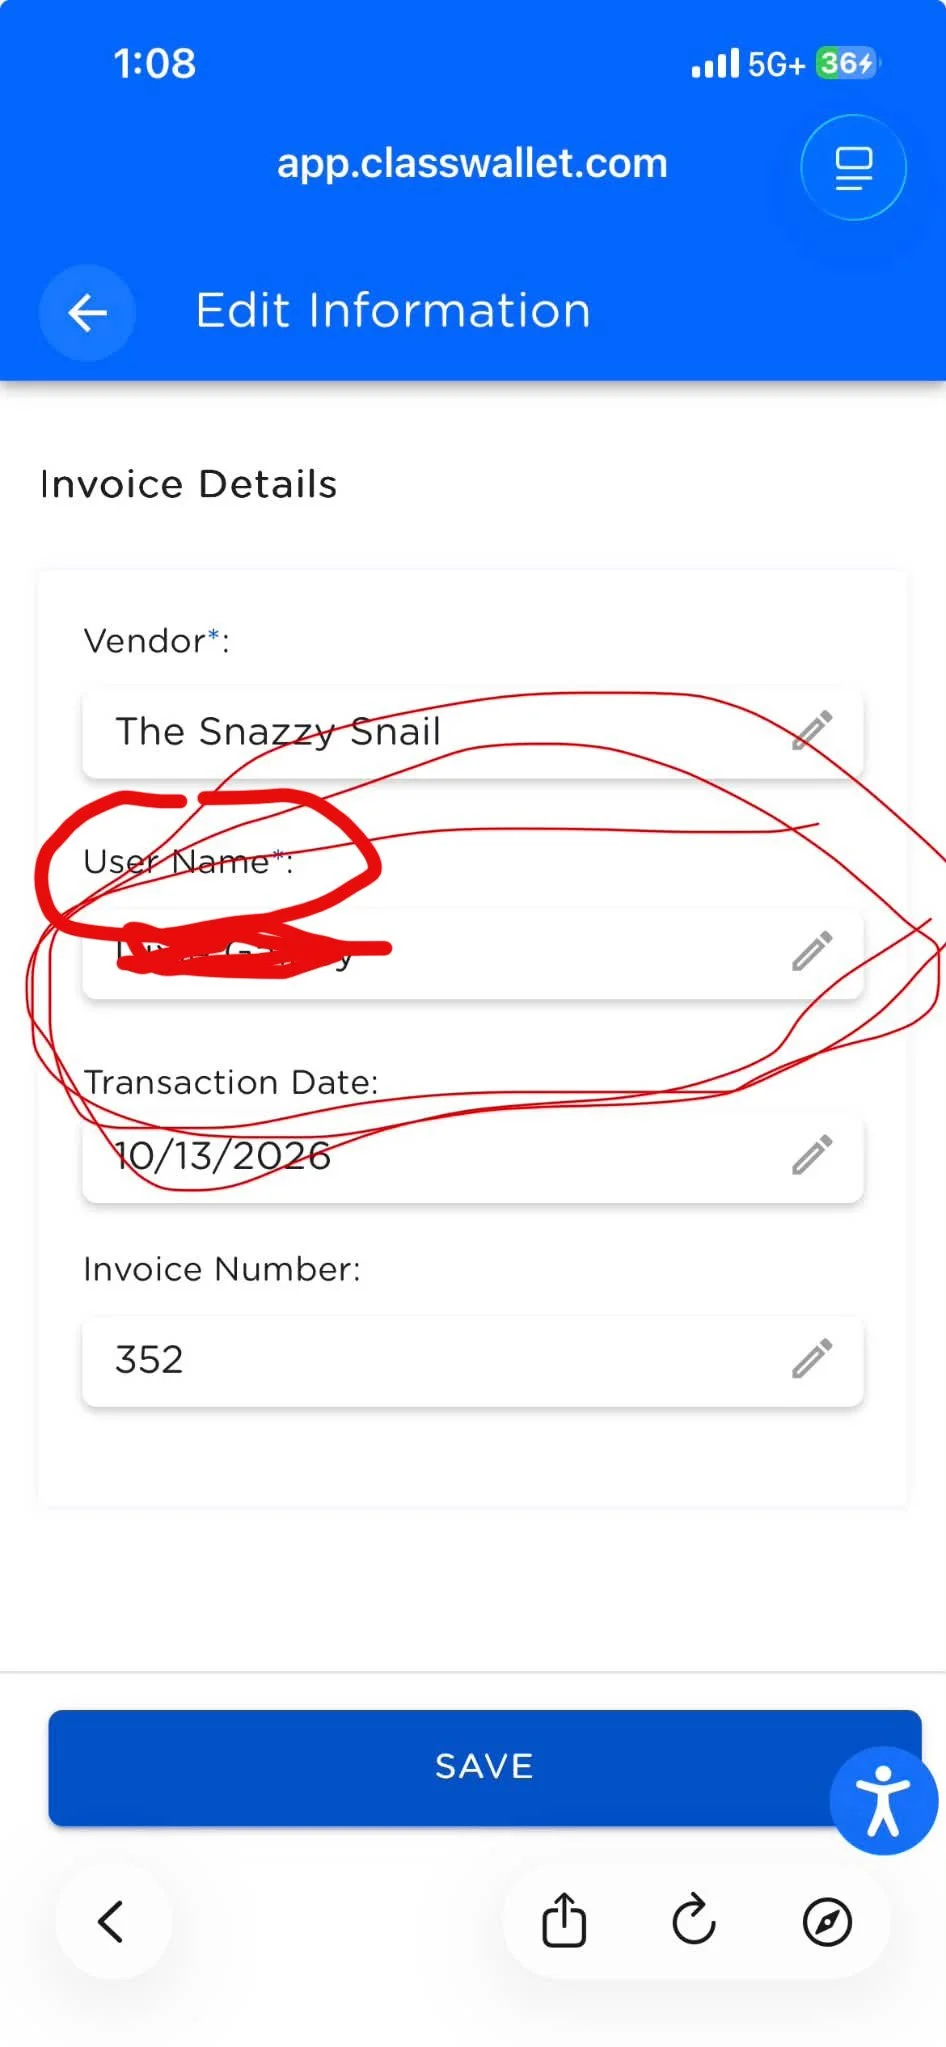
8. NOTE on of the common issues being seen is the AI failing to pull the students name off the invoice and put it here. It did actually pull this one but most of the messages I have gotten this is the error. So, make sure its there.
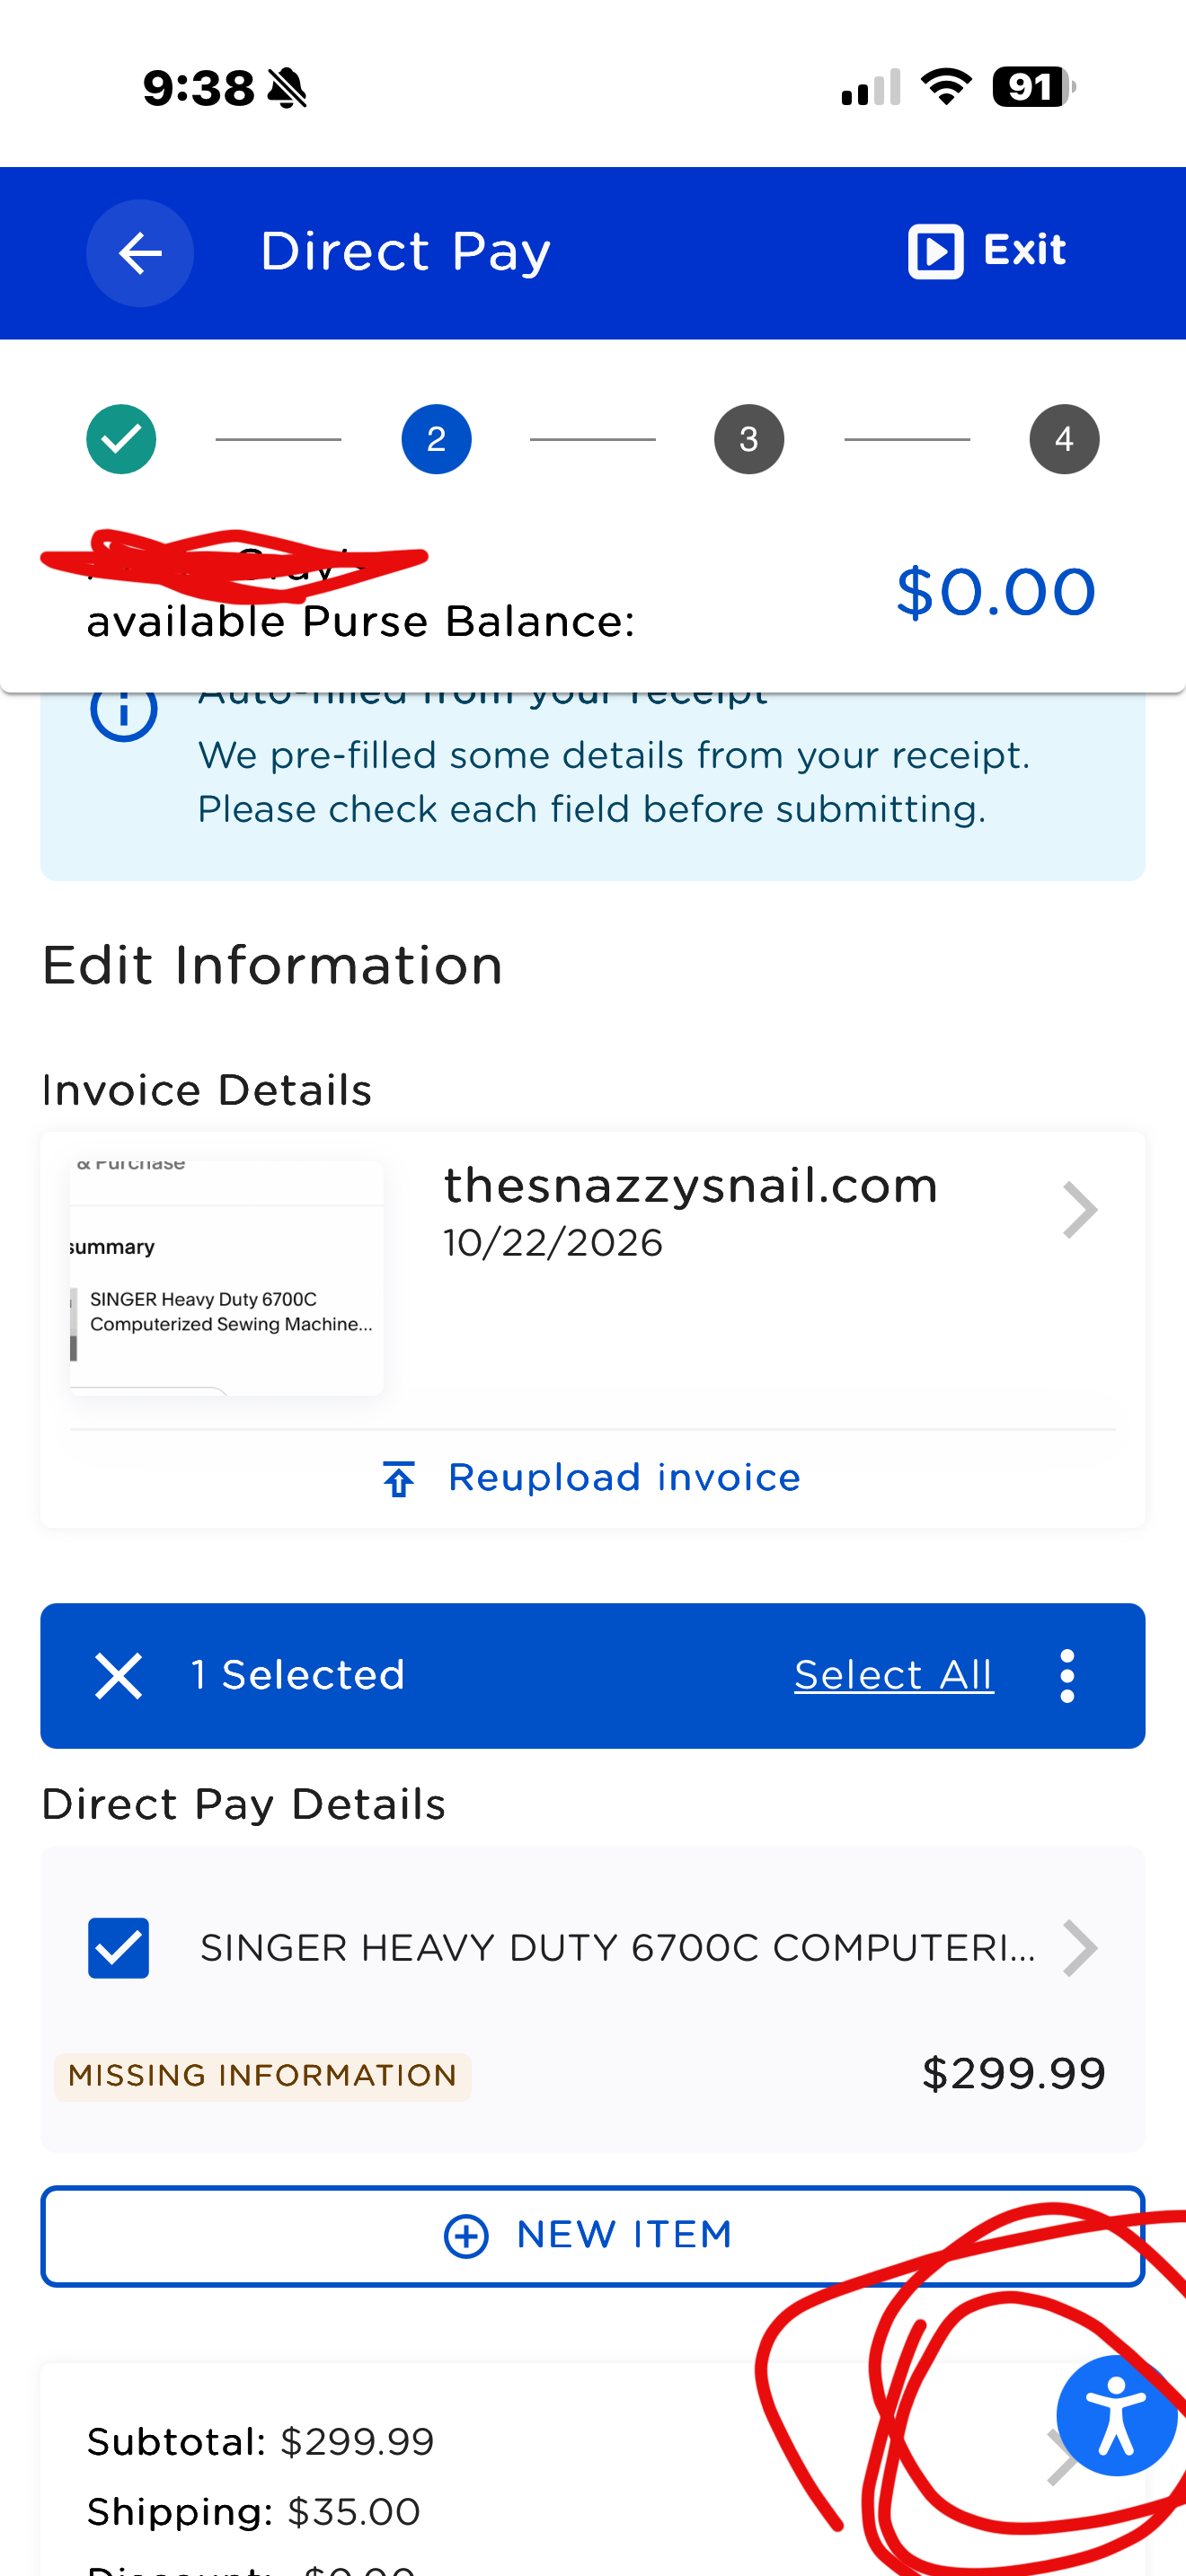
9. Now scroll to the bottom. Click THIS grey arrow here. The other common issue is that it has pulled something and added a discount that it should not or it has incorrectly put the tax amount. Ususally its a discount that isn’t there that it read wrong.
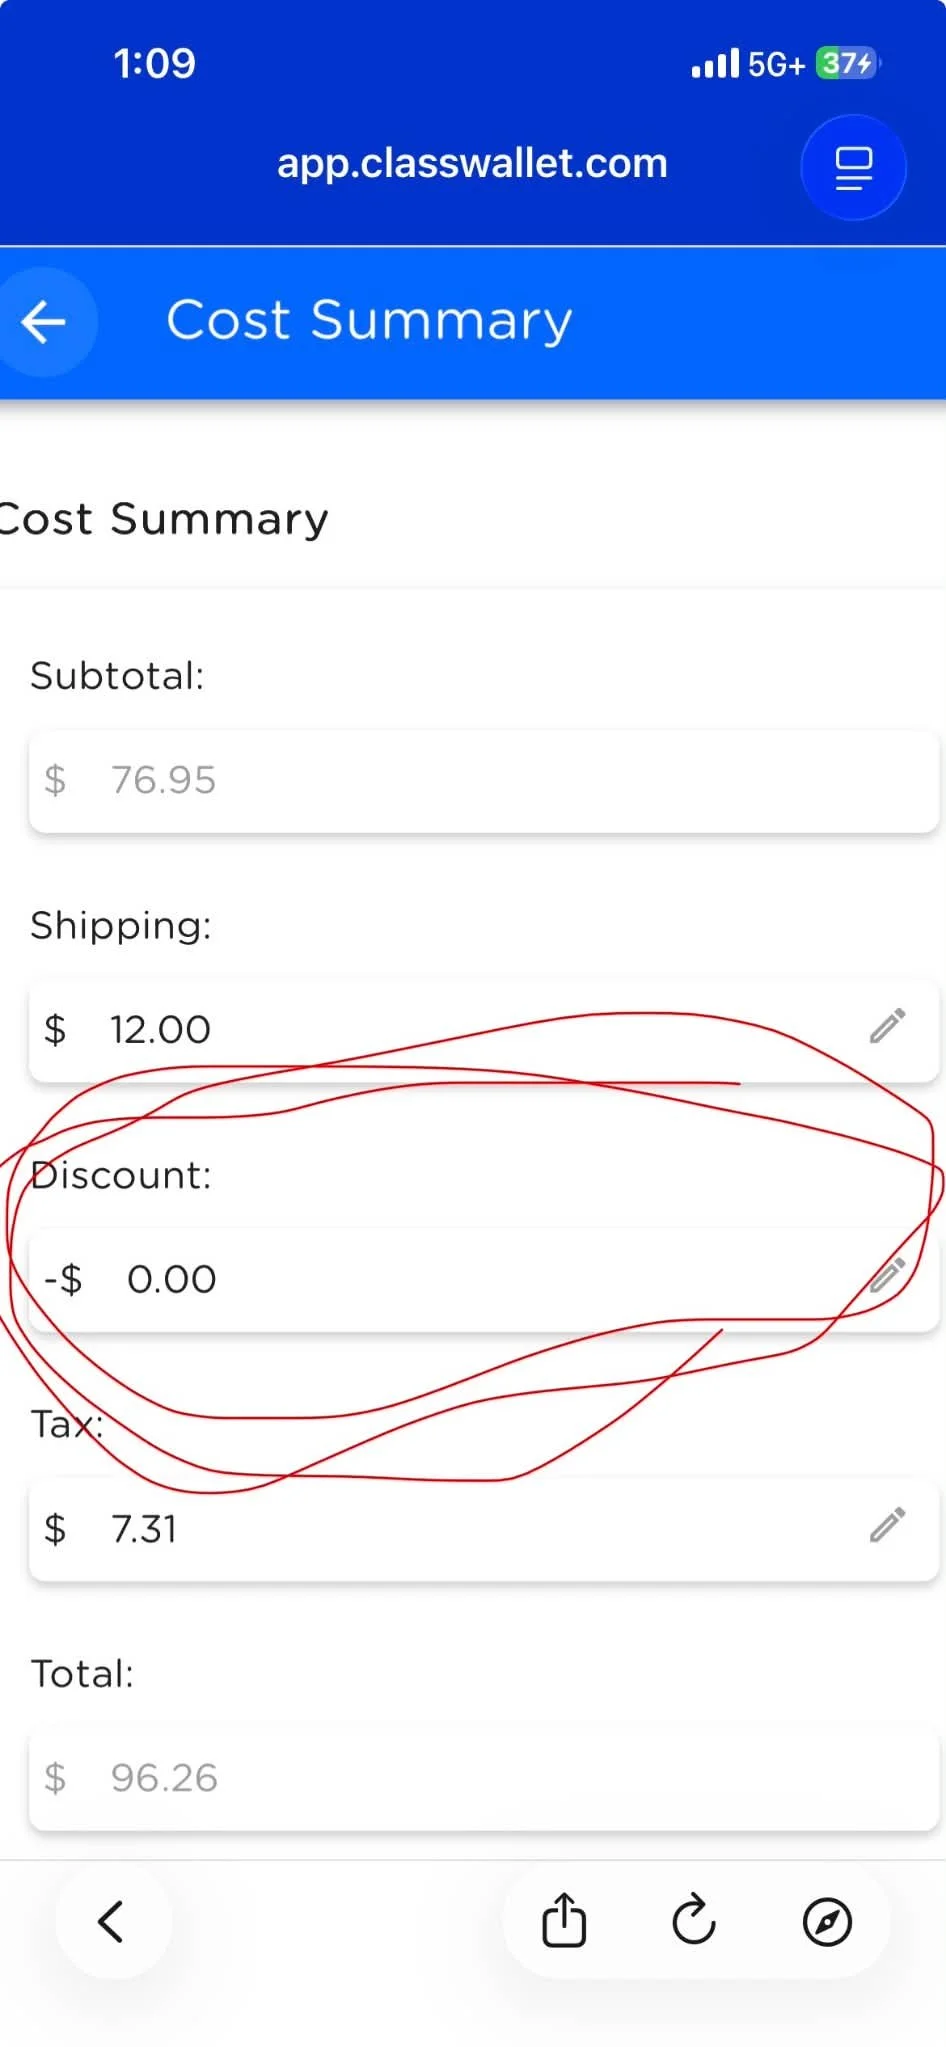
10. Just correct these if any are wrong here. If the subtotal is wrong that’s the previous page.
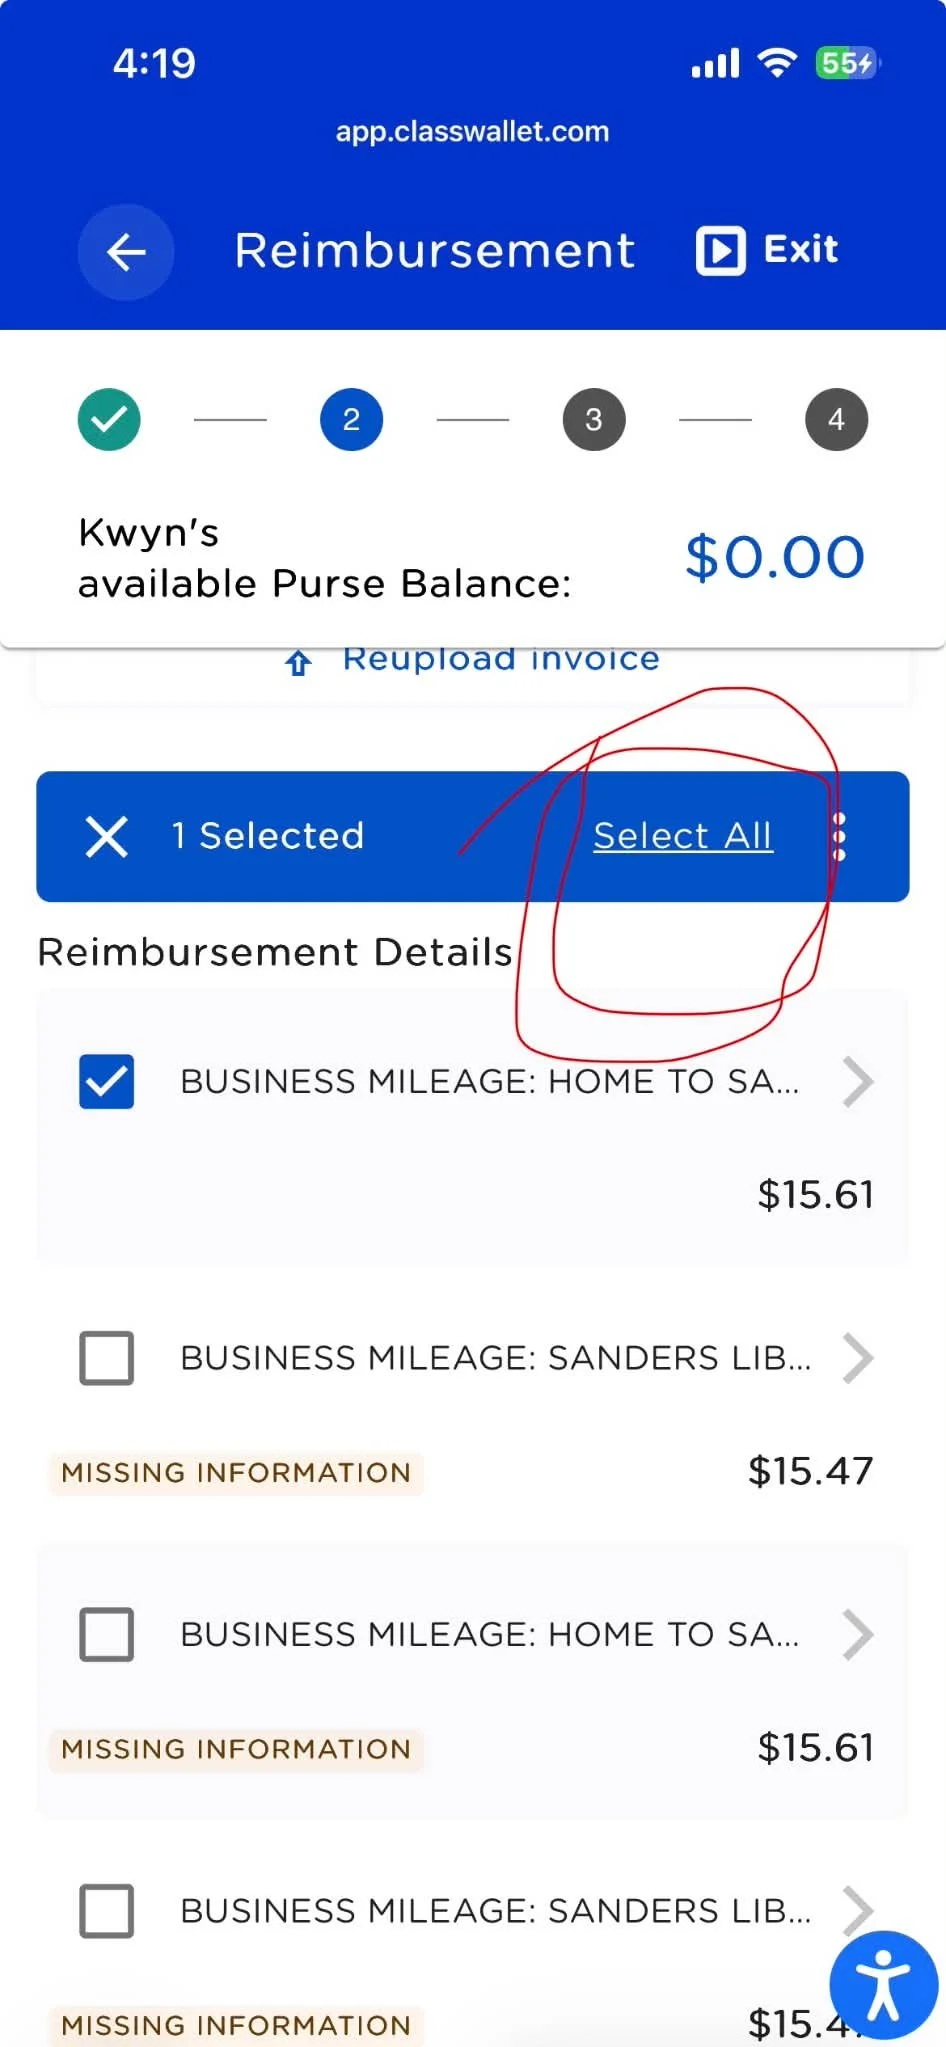
11. click on one of the items once you verify all amounts are right, if its not right the grey arrow by each item will let you edit them. Now click select all.
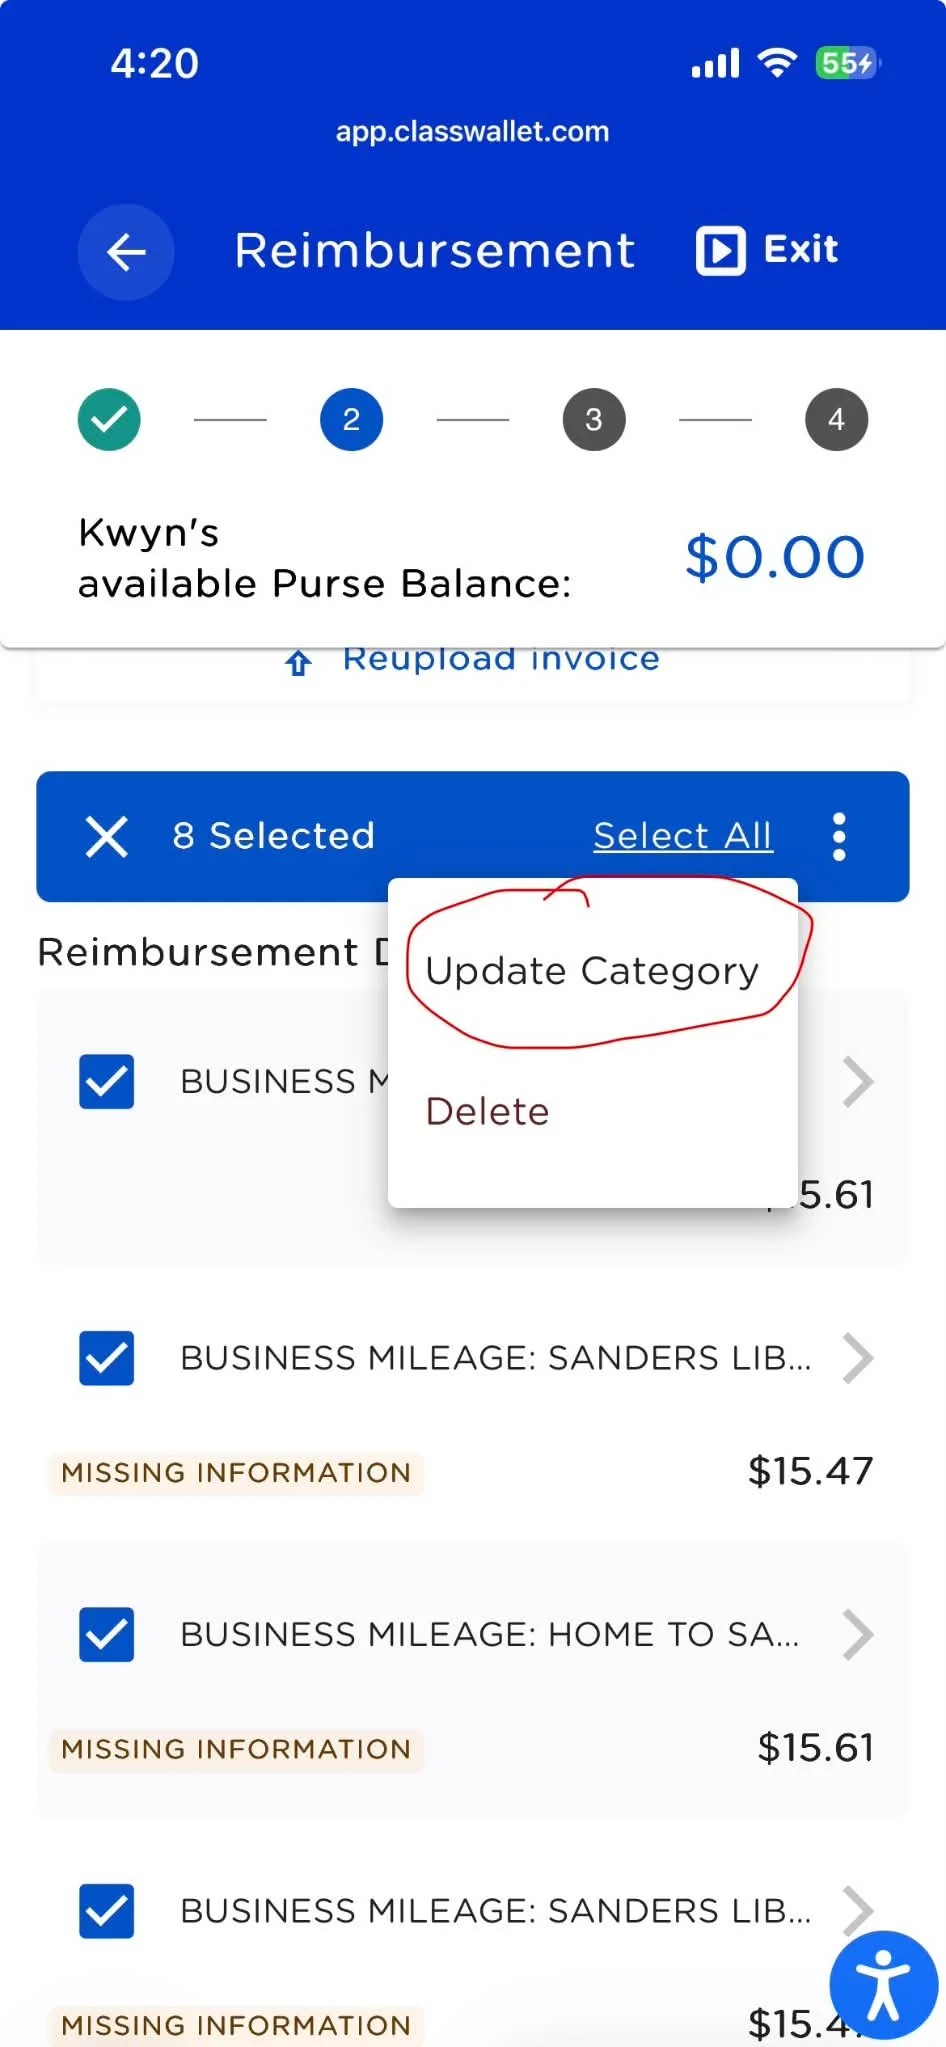
12. you can use this to make all items one category. If they have different categories use the arrow by each one instead and place each in the correct category.
YOU DID IT!!
Well, you got past all the parts it makes hard lol. Now select the purse, choose the category, ADD comments and make sure you have put in any other documentation. If you realize you need more documentation you can still add them the same as before after you submit. But those couple of spots it has hangups and its not real easy to see what is missing. Hopefully this helped you find any errors.